
Baby's First Christmas: DIY-for-Dummies Handprint Ornament
If you've ever tried a hand or footprint craft before, you know they're SO tricky!! Your model is always pulling away, they scrunch their hands up and dig into the clay, ink, or paper with their fingers, and eventually you give up with little to show but a sloppy mess.
This simple faux-clay project has the look of classic salt-dough ornaments with less stickiness, no baking required, and soft-to-the-touch durability when finished, making it extra suitable for preschool crafters too! Read on for a tutorial complete with a basic option as well as modifications for involving a toddler or preschooler!
DIY Handprint Ornament

Supplies
Basic level crafters:
- Crayola Model Magic air-dry clay. ($21 for a “naturals” colour bucket at Toys R Us / Michaels / Amazon). *This is NOT the same as Crayola air-dry clay that comes in a margarine-type tub. That one will just leave you swearing and scraping up goop. You can also buy a tub in primary or neon colours; style is totally at your discretion!
- A scrap piece of paper + a pen/pencil.
- Scissors.
- Rolling pin. If you don't have one, a smooth water bottle or travel tumbler will do the trick.
- Butter knife.
- Sharpie. I used metallic gold; feel free to use what you have, or go buy a fun colour!
- Hanger. A piece of string/twine/ribbon/ornament hanging hook.

Toddler/Preschool crafters may wish to use:
- Crayola paint brush pens. These washable, no-drip paint pens are the bomb.com for toddlers and preschoolers. They're easy to handle and low-mess (I won't say “no mess” because I can't promise your kiddo won't paint the walls or themselves…but hey, at least it's washable!)

Trace their hand
Lay your child's hand on your piece of paper and trace the hand and fingers with your pen/pencil. The beauty of the tracing method (rather than “stamping” their print) is that if your model is squirmy or flail-y, you can take a couple tries plus a little artistic license to get the outline you need without it messing up the final project.
Cut out your template
Cut right along your tracing lines; you don't need to leave any extra! When you get to the wrist/palm, crafter's choice: you may leave it rounded, straight, a scallop/heart shape, etc.
Prep your clay
Take a golf ball sized piece of Model Magic clay. Knead it a few times and then roll flat, 1/2” thick. *You can feel safe doing this on any surface: Model Magic is non-staining for hands and surfaces! I crafted on my porous, white Quartz countertops and there wasn't a blemish in sight when I was finished!
Cut out your clay hand
Place your paper hand on top of your rolled Model Magic and cut around it using your butter knife. *You will notice the Model Magic is kind of self-healing. If you try to cut out the whole shape at once, by the time you get around all the fingers, the first section will be sticking back together already. The best way to handle this is to cut one section and then remove the excess; rinse and repeat until only your handprint remains and all the scrap has been removed. Experiment using your knife in a dragging motion vs. an up-and-down sawing motion; both work, see which is easiest for you.
Finish + allow to dry
Using your pencil, poke a hole in the palm of your clay hand for eventual hanging. Leave your clay to dry for 24 hours before returning to finish your craft. *If you need to move your hand to a safe drying location, use a butter knife or a thin spatula to saw underneath it and gently lift it on to a plate or napkin.
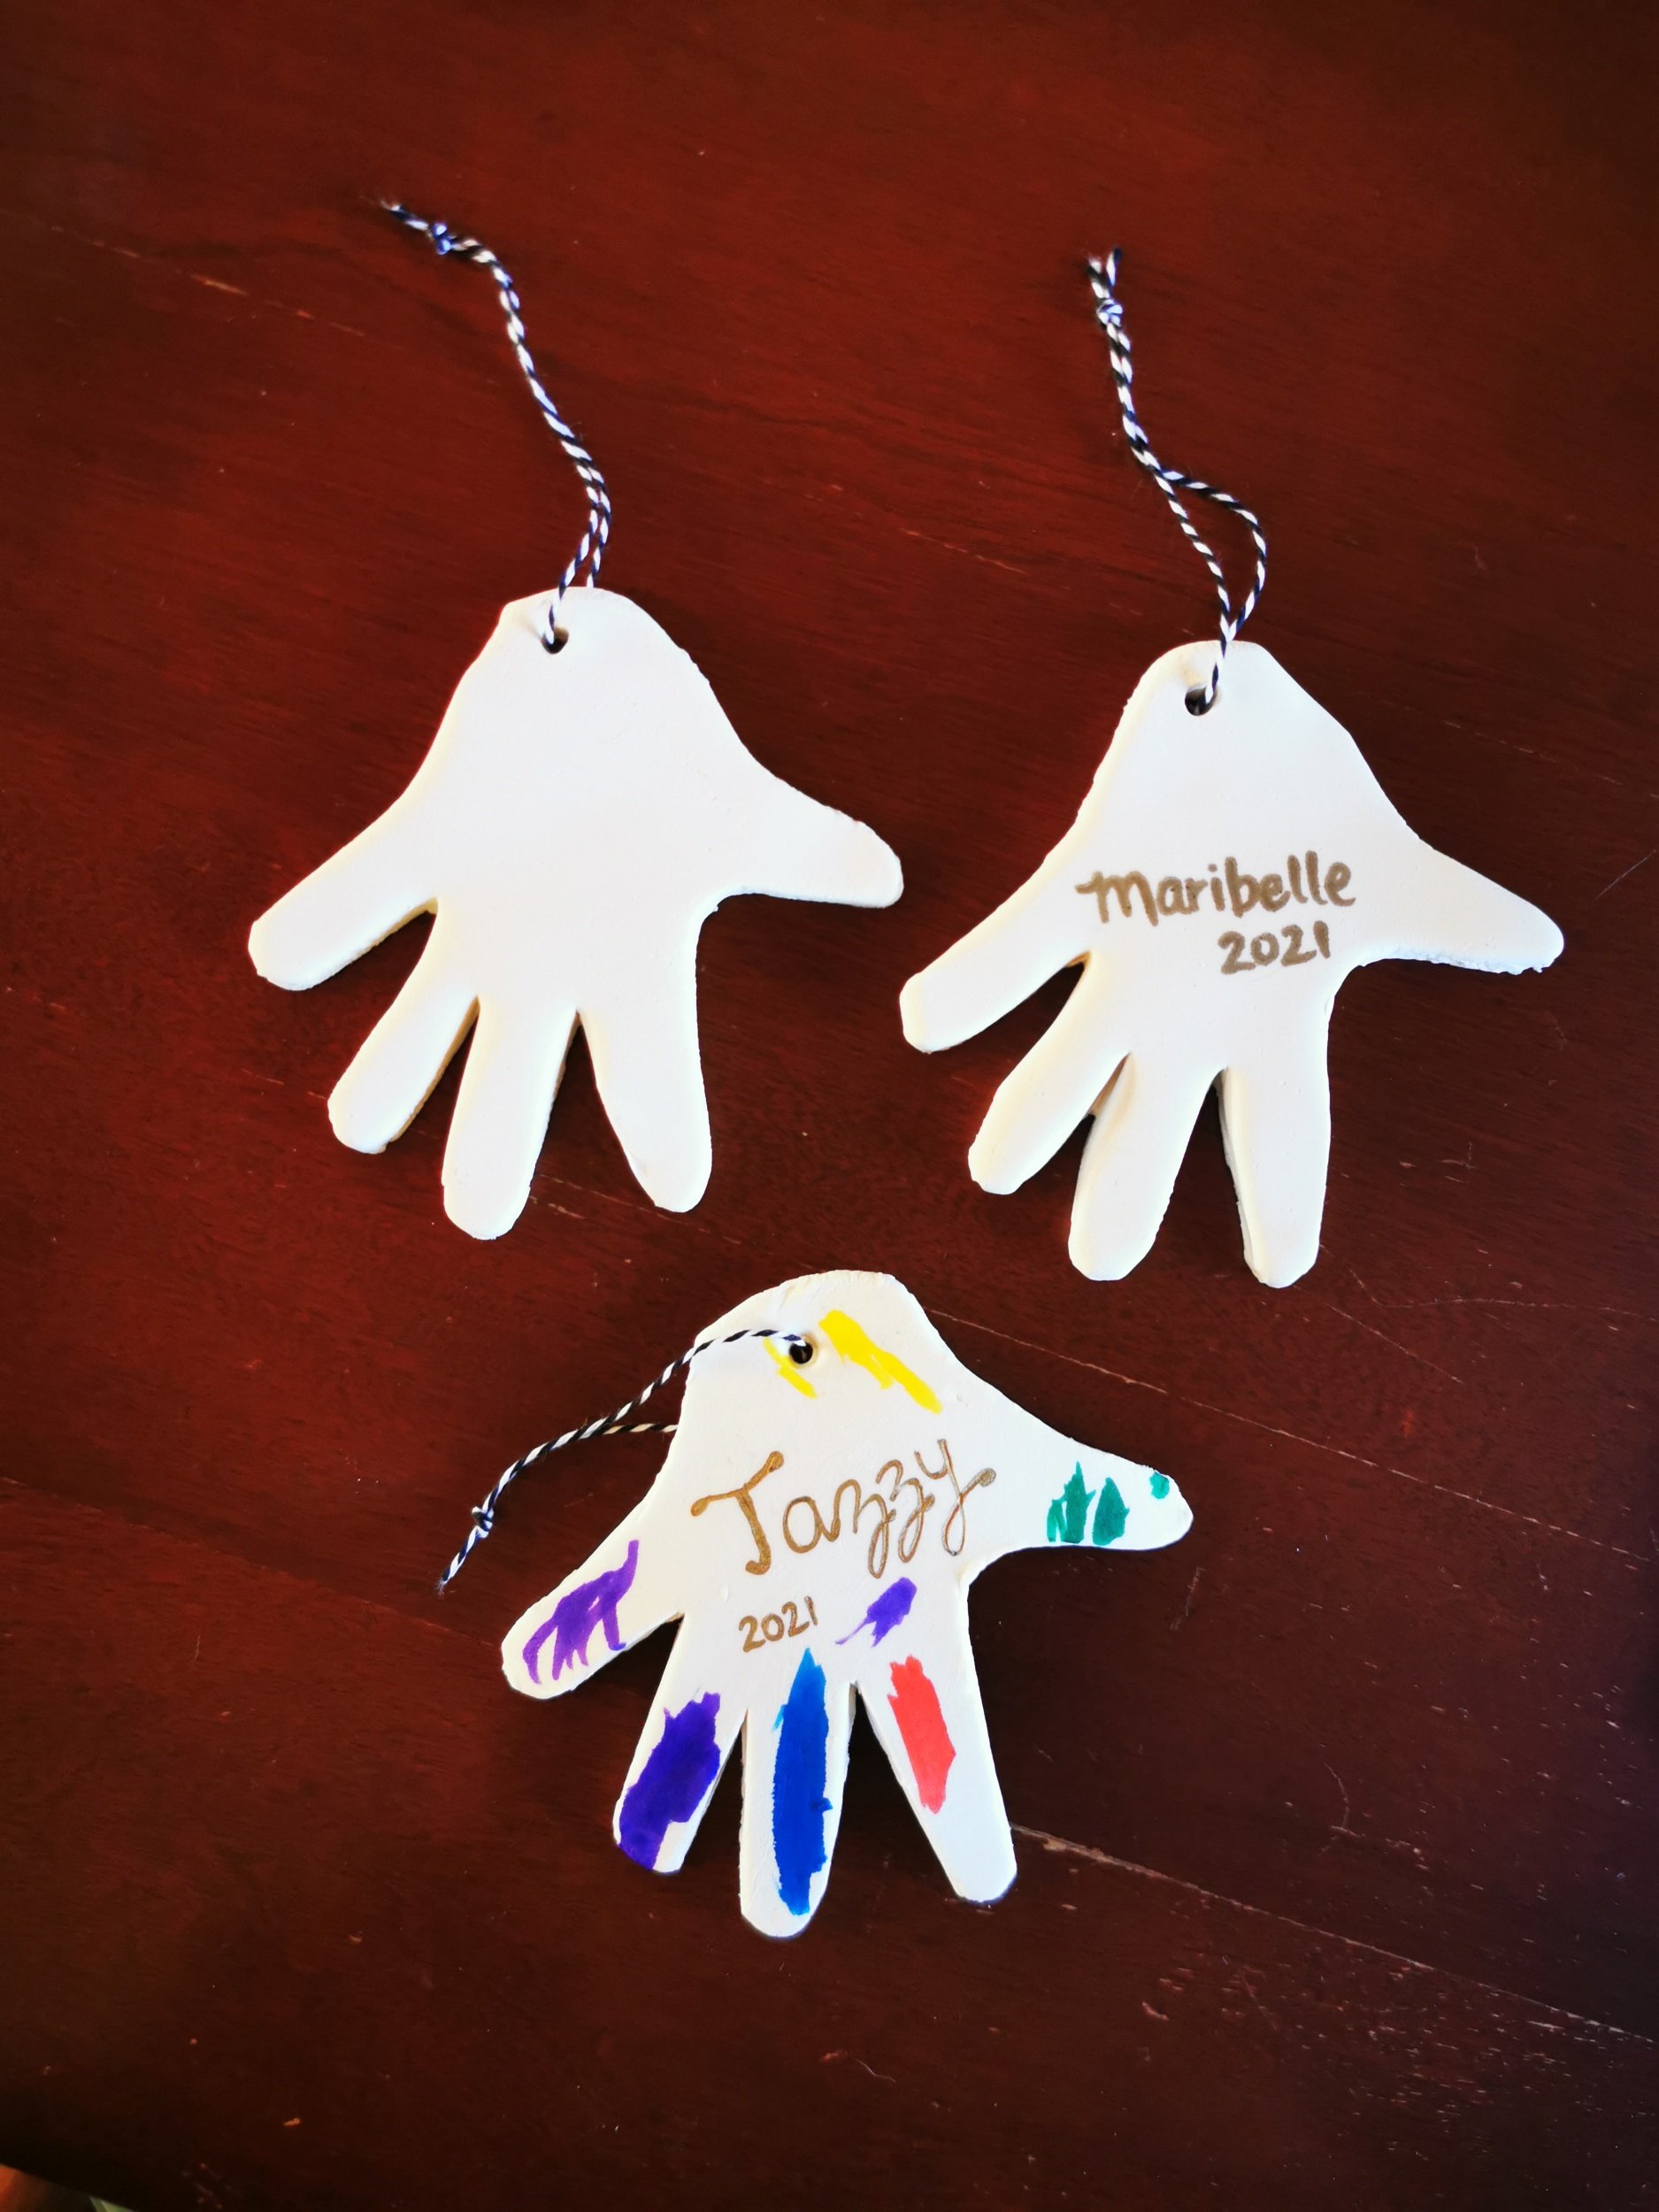
Finish your handprint
This is where preschool crafters really get to have some fun! Use your paint pens to embellish the handprint if desired, or keep them all white for a classic salt-dough appearance.
Using Sharpie, add your child's name and the current year so you can remember just how small their hand was at this specific age. :) *Your Sharpie will “bleed” a little on the foamy finish of Model Magic. Write lightly and quickly for best results. Attach string or an ornament hanger for display!
Preparing this gift while pregnant, or sharing it with an expectant friend? There's still time to book Calgary doula and birth photography services for 2022 due dates!